How-to: Improvisational Patchwork


In the fall I moved into a new (bigger apartment) which meant I got to have a bigger bed which then meant I needed to make a quilt. I started this project back in November and come back to it every so often. Right now I have just over half of the 56 squares pieced together. Today I’m going to share my method for making this quilt. If you feel intimidated by precise measurements and exact cutting—then this technique is for you! It’s really quite fun to make it up as you go along AND there isn’t much math involved.
 

To start cut out a bunch of strips from the fabrics of your choice. I chose some neutrals, some accent colors, some solids, some prints, and cut them in varying widths from 1″-3″ wide. I used my rotary cutter to do this but you can certainly use scissors (it just might take a little longer). Then I cut squares and rectangles anywhere from 3″ to 6″ in size that make up the centers of my blocks. Nothing has to be exact or perfectly square, which makes it a lot less tedious than most quilts.

Now it’s time to start sewing! I set up my machine to stitch 1/4″ away from the edge of my presser foot and thread it with a neutral colored thread. Then I take my center block (right side facing up) and place one of my strips (right side of fabric down) and align the two strips at the corner. Then I stitch down the edge of my center square.

After stitching, I use my scissors to trim the strip to be the same length as the center.
 Then I press the seams open using my iron.
 You end up with a little something like this!


Now it’s time to repeat the process on the opposite side of the square. Again, lining up the center and the strip and stitching 1/4″ away from the edge.

Trim and press and you’ve now got something that looks like this!


Now you’re on to the third side of your center piece. Again, stitching the strip down the edge(be mindful that your pressed open seams get stitched that way as you go). Then trim and press once more!

Just one more side to go! Repeat the same process of stitching, trimming, and pressing.


For the fourth side I used a slightly wider strip of the same fabric. You can mix up the widths of your fabric on each side or keep them all the same.


Ta-da! You now have a square with a border around it! Continue these steps to add more borders until you have a block that is your desired size. For my quilt I am making all of my blocks 12.5″. I find it helpful to make them a little bigger and then trim down to the size I want. As you are making it is helpful to have a ruler handy so you know when it’s getting close to your finished size. In total for my queen size quilt I will make 56 blocks (so that I will have 8 rows of 7 blocks). You can make your blocks any size you might want, however, and adjust this technique for any size quilt.


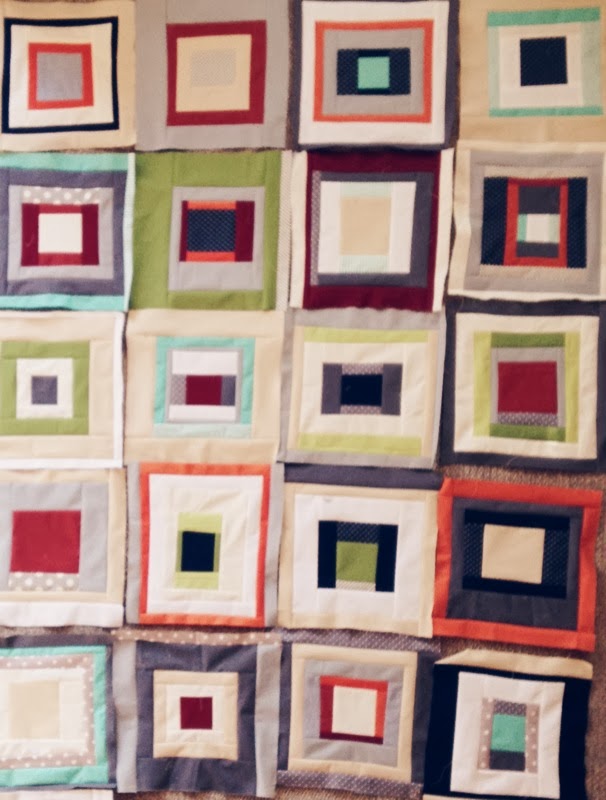
It is also fun to mix up the fabrics a bit as I go to create more interest. Sometimes I use prints and solids of the same color in the same border. then sometimes I use four different fabrics in a border. It is fun to experiment as you go along–never quite knowing when you start a square how it will look in the end!

Happy improvisational stitching!

xo CBB

p.s. you can also find this tutorial over in my Craftsy shop as a free PDF printable download here

Leave a Reply

Your email address will not be published.